Installing and configuring ESPHome with ESP8266 and ESP32
Summary#
I have a Home Assistant installation at home and I wanted to experiment with ESPHome to explore a variety of sensors and switches. The main reason I want to use ESPHome is to control sensors and switches that lack wireless connectivity. Microcontroller boards such as ESP8266 and ESP32 provide WiFi capabilities and a TCP/IP stack simplifying network integration. Additionaly, they offer numerous GPIO pins, I2C and UART interfaces to connect to other devices.
Installing ESPHome#
I am running Home Assistant in a docker container in my home server following these instructions.
These is the container running Home Assistant:
$ docker ps

CONTAINER ID   IMAGE                          COMMAND                  CREATED      STATUS      PORTS     NAMES
2af47891d8f5   homeassistant/home-assistant   "/init"                  3 days ago   Up 3 days             home-assistant
I will install ESPHome the same way, in another container:
$ docker pull ghcr.io/esphome/esphome
$ docker run --rm --net=host --name esphome -v /home/user/esphome/:/config -d ghcr.io/esphome/esphome
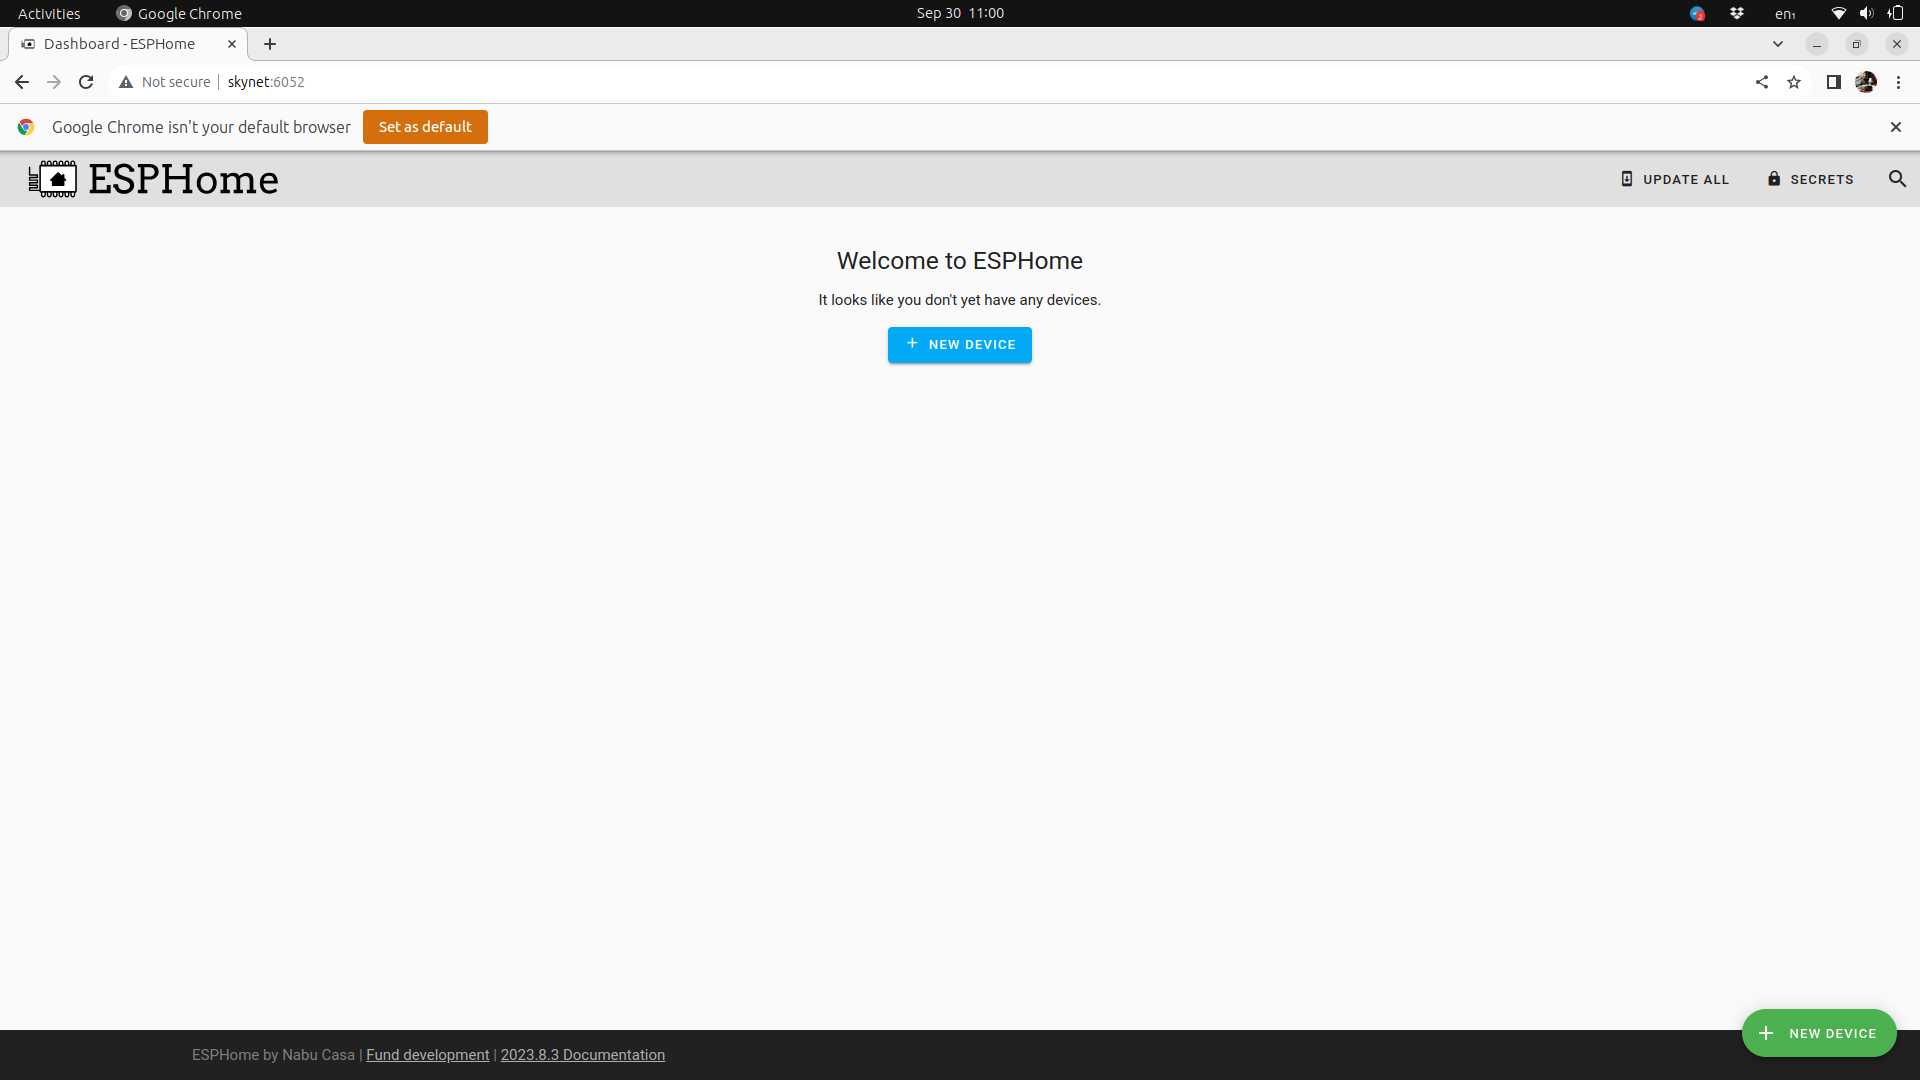
At this point we can access ESPHome by typing our server address and port 6052 in our browser: http://192.168.1.3:6052 and see something like this:
Connecting ESP8266 and ESP32 to ESPHome#
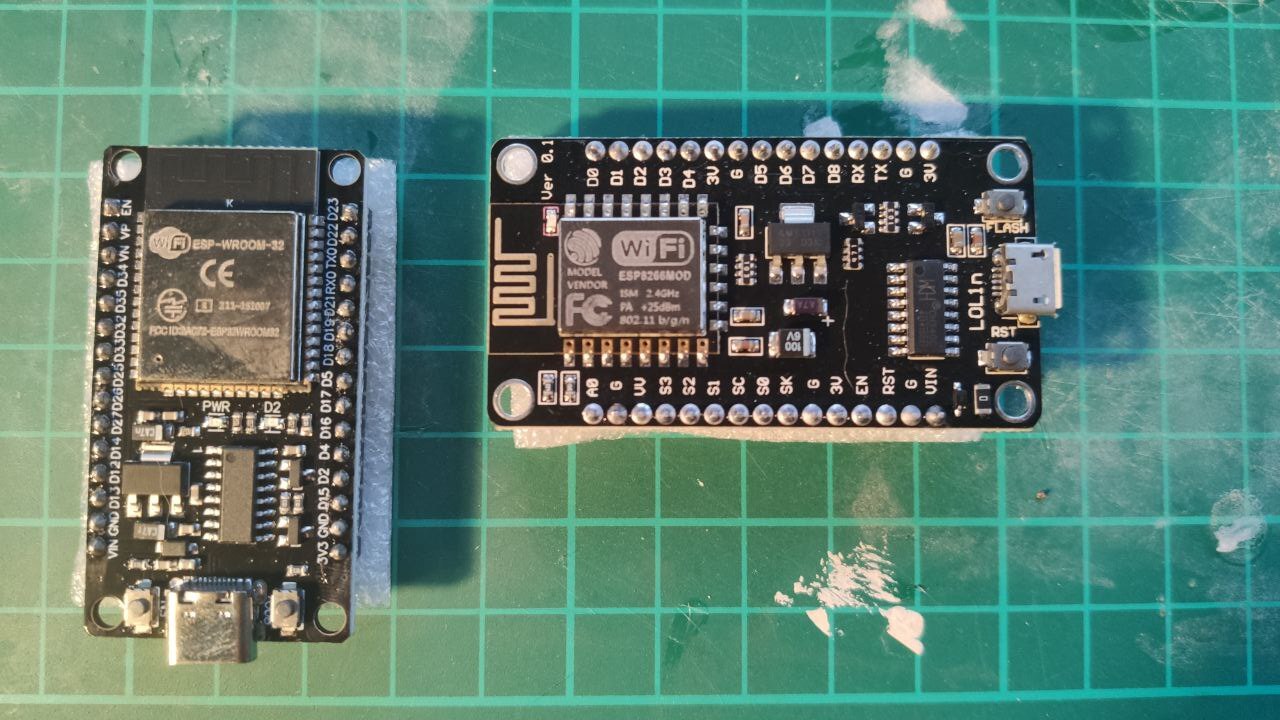
ESPHome supports multiple platforms. I have adquired a ESP8266 and a ESP32. The ESP32 is slightly more expensive but also more powerfull in terms of CPU , number of GPIO pints etc, however what makes the ESP32 more interesting is that it supports Bluetooth and BLE (Bluetooth Low Energy) and it can be used as a Bluethood proxy to connect not only WiFi but also Bluetooth sensors to our Home Assistant.
We will use the ESPHome dashboard to add and configure new devices and connect them to our wireless network. In order to do that we will connect the devices with an USB cable to the physical server hosting ESPHome.
I connected both devices to my server and identified the serial devices /dev/ttyUSB0 (ESP8266, which I plugged first) and /dev/ttyUSB1 (ESP32).
$ sudo dmesg

[51430305.186223] usb 4-3: new full-speed USB device number 5 using ohci-pci
[51430305.379400] usb 4-3: New USB device found, idVendor=1a86, idProduct=7523, bcdDevice=81.34
[51430305.379410] usb 4-3: New USB device strings: Mfr=0, Product=2, SerialNumber=0
[51430305.379414] usb 4-3: Product: USB Serial
[51430305.383031] ch341 4-3:1.0: ch341-uart converter detected
[51430305.393498] usb 4-3: ch341-uart converter now attached to ttyUSB0
[51430335.138985] usb 4-4: new full-speed USB device number 6 using ohci-pci
[51430335.331398] usb 4-4: New USB device found, idVendor=1a86, idProduct=7523, bcdDevice=81.34
[51430335.331408] usb 4-4: New USB device strings: Mfr=0, Product=2, SerialNumber=0
[51430335.331413] usb 4-4: Product: USB Serial
[51430335.342638] ch341 4-4:1.0: ch341-uart converter detected
[51430335.353691] usb 4-4: ch341-uart converter now attached to ttyUSB1
To make the devices visible to the ESPHome docker container we need to expose the /dev/ttyUSB0 and dev/ttyUSB1 devices to our container. For that I will stop and run the container again, but this time mapping both USB serial devices.
docker stop esphome
docker run --rm --net=host --name esphome --device=/dev/ttyUSB0 --device=/dev/ttyUSB1 -v /home/user/esphome/:/config -d ghcr.io/esphome/esphome
Now, from the ESPHome dashboard:
-
Click on Add Device
-
Configure the device by choosing a name and selecting our WiFi SSID and password.

-
Select the device type, in this case we are configuring first ESP8266 but we will run the same steps after for the ESP32. Alternatively we can uncheck Use recommended settings and we will be able to choose the board we have.

-
At this point we will get an access key for this device, we don’t need to remember this as it wil be stored in the ESPHome config and we can retrieve it whenever we want.
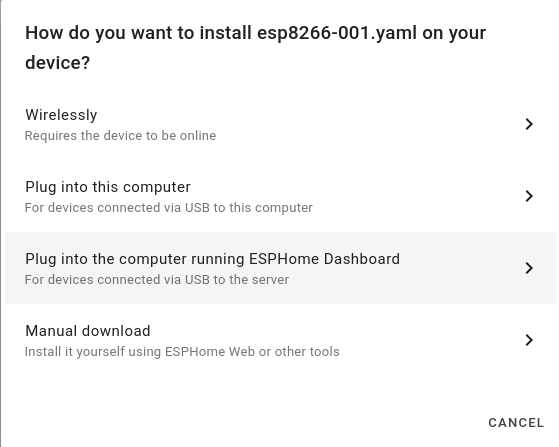
An entity was created for our device and ESPHome will ask us how we want to install the firmware in the device. In my case I have selected Plug in the computer running ESPHome Dashboard and selected /dev/ttyUSB0 (/dev/ttyUSB1 for the ESP32) device.
The installation will start. Once it is completed we can repeat the same steps to configure the ESP32, this time we will not have to provide the wifi configuration but just the name of the device. We can repeat this steps to add as many devices as we want.
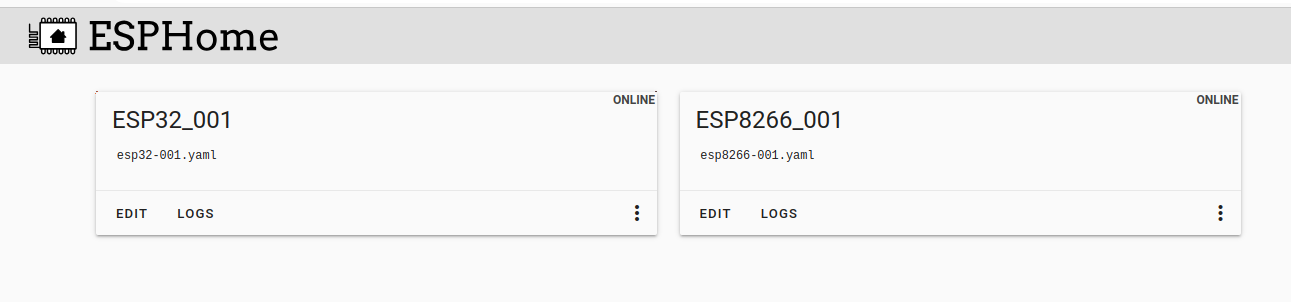
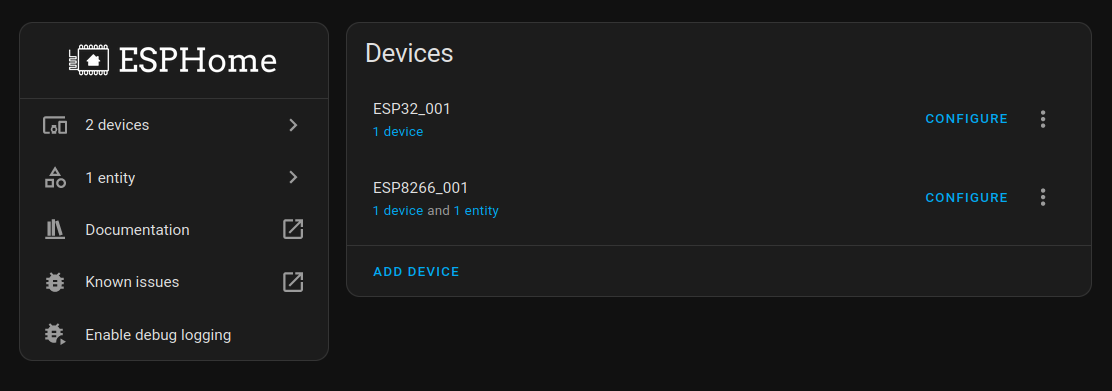
We will be able to see and further configure the devies from the dashboard:
There is no need to keep the devices connected to the Home Assistant server anymore, now we can place them wherever we want as far as they have a power source and they are located within our WiFi network range.
Add devices to Home Assistant#
If everything went well Home Assistant will auto-discover the new devices:

We just need to authenticate the devices by clicking on configure and adding the devices access key that we can retrieve from the ESPHome Dashboard device configuration.
Configure a simple light switch#
In order to test our installation we are going to connect a LED to one of the boards and configure it so we can turn it on/off from Home Assistance.
From the ESPHome dashboard, select the device where you want to add the LED and click on EDIT and add the following configuration:
light:
  - platform: binary
    name: "Green_LED"
    output: light_output

output:
  - id: light_output
    platform: gpio
    pin: GPIO5
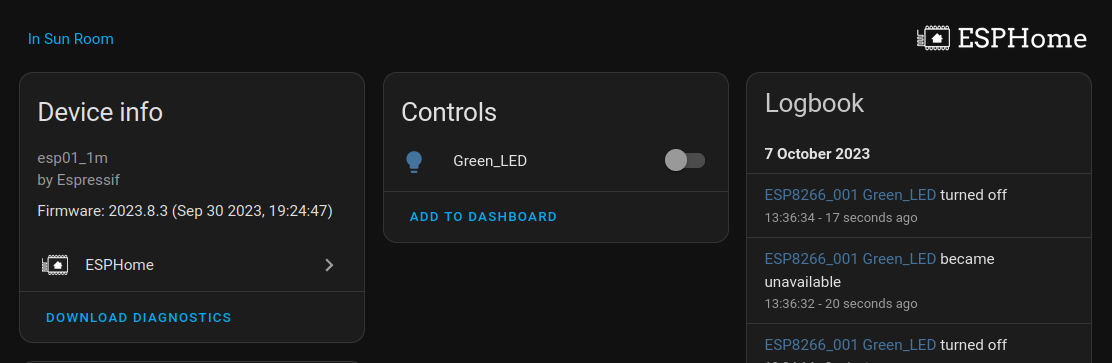
Click on INSTALL to push the new configuration to the device. ESPHome will ask us how we want to install that configuration and since the devices are now connected to the WiFi we no longer need to connect them to the ESPHome server anymore but we can push the new changes wirelessly.
Once the new configuration is pushed to the device we will be able to see a new entity associated with the ESP device in Home Assistance.
We can identify which is the GPIO5 pin in our board and connect between the LED between GPIO5 (D1 in my board) and GND (ground) pin.
Next steps#
So far we have configured ESPHome and 2 devices. This is not useful by itself but now we can connect other devices to the ESP32 and ESP8266 that we can remotely control from Home Assistant.
There are a huge list of sensors and other devices supported in the ESPHome home page.